Napoleon's Plan Block | Chopping Block Quilts
Image

Napoleon’s Plan: 2015 Fabri-Quilt New Block Blog Hop

2015 Fabri-Quilt New Block Blog HopThis project was very anxiety inducing for me. I tend to improv designs from inspiration photos and don’t follow patterns. Yet, I have never truly designed my own block, let alone written a tutorial for others.

The logistics of getting fabric to arrive in a timely manner in Costa Rica were impractical. A compromise was made; I worked from my own stash of solids and Cheryl at Meadow Mist Designs was nice enough to sew my block (and give some feedback) by using the provided “Watermelon Summer” Prairie Cotton Solids from Fabri-Quilt that will be included in the final charity sampler quilts.

True to form, I did not design an original block; however, I modified the method used by another. Blossom Heart Quilts has a great tutorial for a paper pieced Houndstooth block. Being irrationally terrified of paper piecing and wanting to create a multi-color houndstooth block, I embraced Napoleon’s Battle Plan.

Napoleon’s Plan Houndstooth Block Tutorial
It’s a two part plan:
First- We sew up
Then- We see what happens

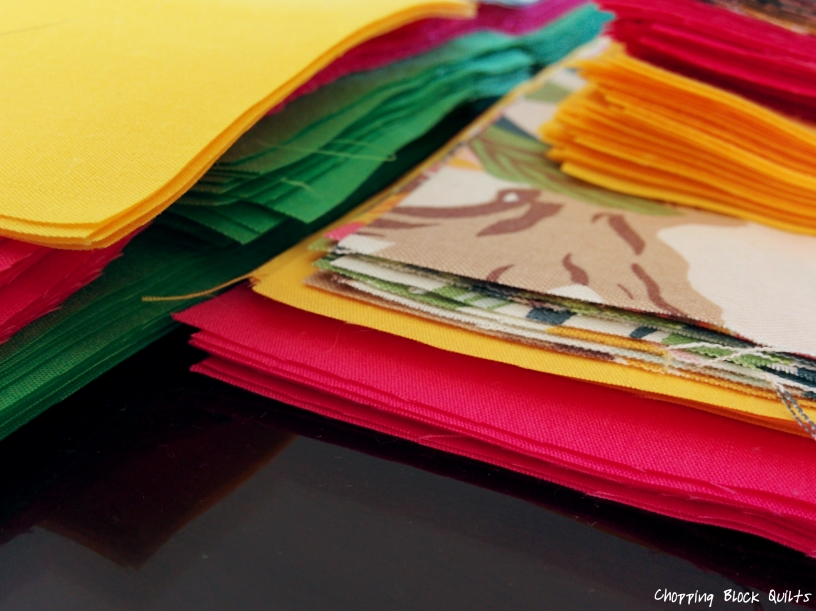
From 5 Fat Eighth colors cut:
2- 1.5″xWoF Strips
1- 3″xWoF Strip

Napoleon's Plan Block | Chopping Block Quilts

Cut 2- 1.5″ x WoF strips from each color

Napoleon's Plan Block | Chopping Block Quilts

3″x WoF strip

Cut the 3″ strip into 3″ squares

Lay out the 1.5″strips in an order that has color combos that make you happy

Napoleon's Plan Block | Chopping Block Quilts

My preferred color order/combinations

Take one strip from each color and shift down (or up if you prefer) to create new pairs.

Napoleon's Plan Block | Chopping Block Quilts

Shift 1 strip to create new pairs

Offset the strip ends by 1.5″

Napoleon's Plan Block | Chopping Block Quilts

Strips offset before sewing together

Sew strips together and press to the dark

Napoleon's Plan Block | Chopping Block Quilts

Strip pair sewn together

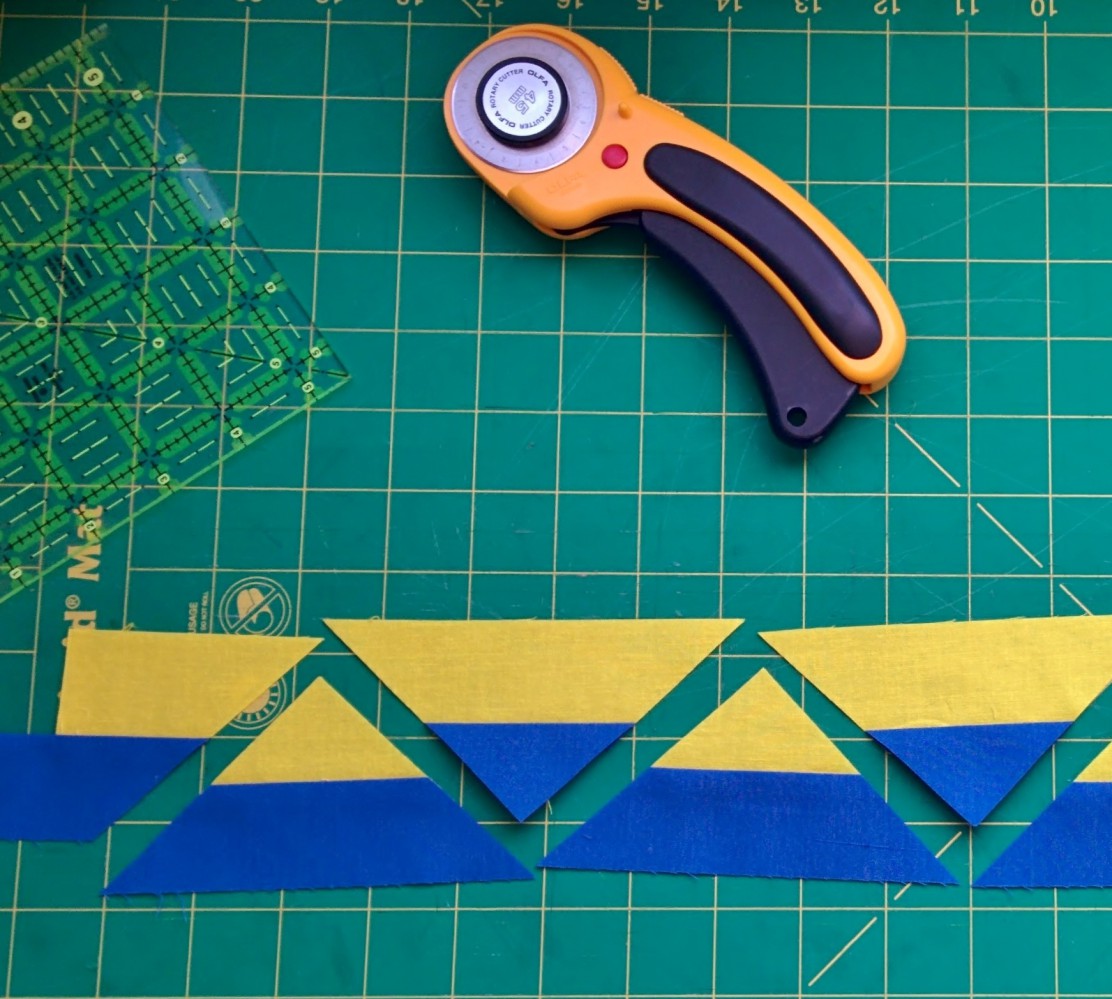
Using the 45° line on your ruler, cut triangles down the length of the sewn strips.

Napoleon's Plan Block | Chopping Block Quilts

Cut triangles down length of strip

You should get about 7 triangles total

Napoleon's Plan Block | Chopping Block Quilts

Cut down length of strip

Repeat for each combo of sewn strips

Napoleon's Plan Block | Chopping Block Quilts

All combos cut and ready to go

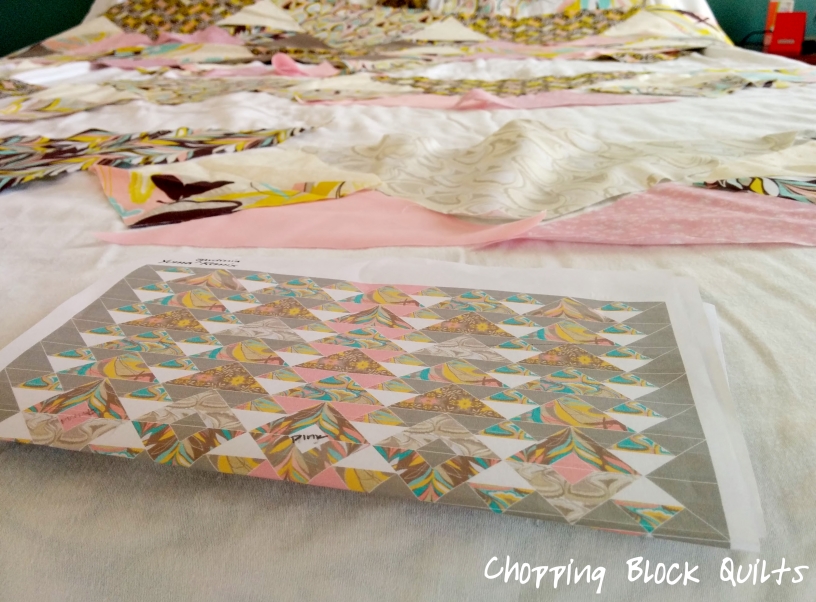
To create your block layout, I found it easiest to work from the center diagonal out.

Working with pairs of triangles, the two small triangles will form the upper right corner of the “houndstooth” and two longer triangle sides will form the lower left “tails”

Napoleon's Plan Block | Chopping Block Quilts

A design board or wall is helpful at this point

Once your layout is finalized, sew the 45° triangles on the long side (don’t worry this is not a bias edge) and trim to 3″square

Napoleon's Plan Block | Chopping Block Quilts

Trim down to 3″. Oh how I wish I had a bloc lock ruler!

In rows, sew the multi-colored squares to the solid squares and press to the solid square

Napoleon's Plan Block | Chopping Block Quilts

Press to the solid square

Sew the rows together, nesting the seams

Napoleon's Plan Block | Chopping Block Quilts

Nest the seams and press the rows to one side

Congrats! You have successfully executed Napoleon’s Plan!

Napoleon's Plan Block | Chopping Block Quilts

Final block measures 13″ square unfinished, 12.5″ square finished

Napoleon's Plan Houndstooth Block | Chopping Block Quilts

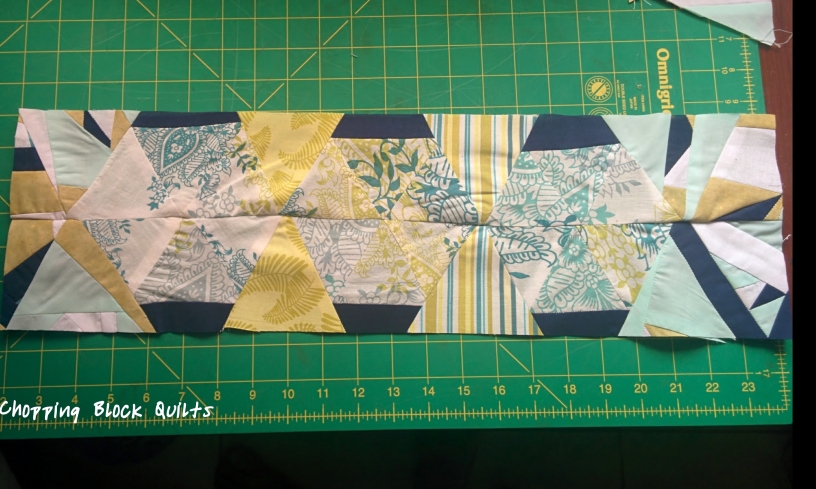
Finished block in Watermelon Summer colorway sewn by Cheryl at Meadow Mist Designs

Now for the real fun stuff
I encourage you to check out my fellow bloggers from today and earlier this week. From 6 fabrics, these immensely creative people have designed 60 different blocks using a whole variety of techniques.

Today’s Host: Stephanie @Late Night Quilter
Hannah @Modern Magnolia Studio
Cindy @Stitchin At Home
Abby @Hashtag Quilt
Lisa @Sunlight in Winter Quilts
Carrie @Chopping Block Quilts
Brianna @The Iron and Needle
Tish @Tish’s Adventures in Wonderland
Jan @The Colorful Fabriholic
Sarah @Smiles Too Loudly
Beth @Cooking Up Quilts
Leanne @Devoted Quilter
Liz @LizzyClips Design
Kim @Leland Ave Studios
Kitty @Night Quilter

Day 1 Monday Host: Quilting JetGirl
Day 2 Tuesday Host: Meadow Mist Designs
Day 4 Thursday Host: Childlike Fascination

One of my fellow bloggers, Jayne from Twiggy & Opal, has graciously created a Pinterest board of all the blocks from the four-day blog hop.

Giveaways.
Inspired by Fabric (Fabri-Quilt) is giving away a 1/2 yard cut of EACH of the 6 Prairie Cloth Solids in the Watermelon Summer colorway.

Watermelon Summer | Prairie Cloth Solids | Fabri-Quilt

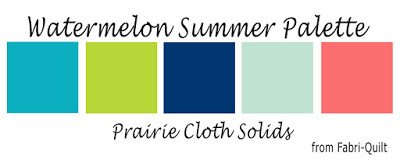
Turquoise, Chartreuse, Lapis Blue, Aqua, Coral, White

Visit Stephanie @Late Night Quilter and  Inspired by Fabric for two chances to win!

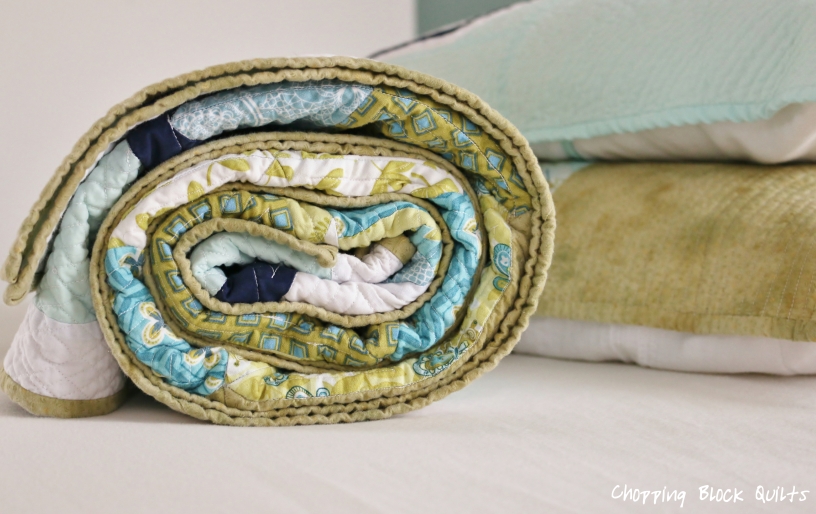
Oh and wondering what to do with those extras not used in the block? I turned them into quilted soft blocks for my baby niece.

Napoleon's Plan Soft Block | Chopping Block Quilts

I sewed up, this is what happened.

If you have any questions or need clarification on the block construction please let me know.

Thanks for stopping by!

Carrie @ Chopping Block Quilts

White Chicken Chili | Chopping Block Quilts
Image

Brought to you by the letter “G”

Today’s post is brought to you by the letter “G” for Green!  It has nothing to do with quilting, this is one is all about green foods!

Ever buy a bunch of celery at the grocery store to have it go limp a day later? Super frustrating. Thankfully there is an easy and (relatively) quick fix.

Sad Celery | Chopping Block Quilts

Sad Celery

Celery is a vegetable that loved boggy/swampy conditions and has a high water content. When it slumps over it’s due to a loss of water. To fix this you simply need to cut off the bottom of the stalks (about an inch) and place in a glass of water.

Happy Celery | Chopping Block Quilts

Happy, re-hydrated celery

After a few hours they perk right back up.  I then store my celery in a tupperware with a few paper towels in the fridge.  This keeps them nice and hydrated and will last me the rest of the week while I use them up.  One of my instagram friends (@kringelb) also said this trick works with sad carrots.

What is celery good for? Well it’s an essential ingredient in my White Chili. Funny it’s called white chili when most of the ingredients are also green.  I cannot take total credit for this recipe. I picked it up in Trader Joe’s many many years ago.  It has become one of those meals I can make on auto-pilot and I usually have the ingredients on hand. Italics are the substitutes I make here in Costa Rica.

White Chicken Chili

1 can chicken broth 1 cup chicken bullion season in warm water
2 cans cannellini beans (drained) Substitute other white beans or garbanzos
1 jar salsa verde (any brand, watch the heat rating)
1 bag frozen corn 1 can of corn
1 pkg (~1lb) ground chicken or turkey Cooked shredded chicken breasts or thighs
1/2 yellow or white onion (or 1 onion if you like them) chopped
2-3 garlic cloves (depending on what you like)
2-3 celery stalks chopped
2 poblano peppers seeded & chopped 1 jalapeno without seeds
Cumin, salt, pepper to season to taste (aka SPC or Lilly, Marshall and Ted)
Shredded Chicken | Chopping Block Quilts

Kitchen Aid Mixer: Preferred method to shred chicken

  • Saute onions and garlic. Add ground chicken & season w/ salt, pepper & cumin. Strain grease.
  • Add chopped celery and peppers, cook for few minutes to get juices from celery
  • Add beans, salsa verde, corn, broth and seasonings. I usually fill half the empty salsa verde jar with the broth or water & shake to get extra salsa out of the jar.
  • Season again with SPC to taste.
  • Simmer. The longer the better. This tastes amazing the next day.
Top with any combination of the following (or all):

Diced Avocado
Cilantro
Cheese (pepper jack or monterey or cheddar or your favorite)
Sour Cream
Tortilla chips (or corn tortillas baked crispy)

White Chicken Chili | Chopping Block Quilts

White Chicken Chili with ALL the toppings 😀

For the final green food I present Spicy Guacahummus. This is a great snack food, is awesome on sammiches, and great as a mayo substitute in tuna salad.

Spicy Guacahummus

1 can garbanzos (drain and reserve juice)
1 jalapeno, seeded and cut into chunks
1 ripe avocado
3-4 garlic cloves
EVOO
2 limes, juiced
Handful of Cilantro
SPC

  • In a blender combine garbanzos, jalapeno, avocado, garlic cloves, cilantro, lime juice, and a few tablespoons of EVOO the reserved garbanzo juice.
  • Add salt, pepper and cumin to liking. Blend. If mixture is too thick, add a little more of the garbanzo juice and blend until desired consistency is achieved.

Serve with home-baked whole wheat pita chips or put on your favorite sammich. I have no idea how long Guacahummus will last in the fridge as it usually disappears within 24 hours.

Guacahummus | Chopping Block Quilts

Guacahummus and Whole Wheat Pita Chips

Buen Provecho!

Image

Yuma QAL Sardinia Finished Flimsy

I’ve been a bit MIA lately, but that’s only because I’ve been rushing to finish my Yuma QAL top.

I decided to enlarge the original pattern from a 64″ x 64″ to a queen size quilt. Using EQ7 I recreated the design, extended the rows, and added a few additional ones.The finished flimsy comes in at 90″ x 88″.

There have been a few lessons I’ve learned while working on this top.

#1- Measure twice, cut once but read the directions THREE times (or more).  Originally I planned on using a yellow for the top but the fabric I had did not play well with the chartreuse in the prints. After a trip to the local fabric shop (a topic for another post), the only fabric they had that went with my selected (and cut) prints was a mushroom grey-brown solid.

Prints cut and ready to go. Sardinia by Jessica Swift for Blend Fabrics.

Prints cut and ready to go. Sardinia by Jessica Swift for Blend Fabrics.

I did not pay close enough attention to the instructions when it came to cutting background fabric and ended up needing to purchase more of the mushroom solid. At least I have more scraps to play with for the backing.

Scraps to play with for the back

Scraps to play with for the back

#2- Make a plan and stick to it.  There are some fabrics that are not placed in my preferred symmetrical(ish) manner. This is because I made a plan, changed the plan, did not print out said plan, and did not double check the layout on my “design bed”.

Laying out the pieces on my

Laying out the pieces on my “design bed”

#3 Pin, pin, pin. When sewing triangles, it’s important points line up and don’t shift. After this quilt, I am totally seeing the value in the Marti Michelle’s corner trimmers and really want one now. Perhaps something to get when I visit the states in October…

The Good, the bad and the ugly pieced points

The Good, the bad and the ugly pieced points

Overall, I am happy with the finished top and excited to start piecing the back. I have a few ideas and feel free to play since it will be more of a secondary top. As for the quilting, I have a few ideas but need to let them marinate. I will be quilting the whole thing on my domestic Singer and this is by far the largest quilt I will attempt. I need to get my courage up.

Finished Queen Size Yuma Flimsy

Finished Queen Size Yuma Flimsy

Flimsy on a Queen Size Bed

Flimsy on a Queen Size Bed

Before I do all that, I am jumping over to the Meadow Mystery QAL and piecing some no-waste flying geese (a new technique I have been wanting to try).

To end on a positive note, Dora wants to remind everyone to take time and smell the (tropical) flowers.

IsaDora Paulina Gozer Sombra | Chopping Block Quilts

Carrie @ Chopping Block Quilts

Linking up like crazy to:
WIP’s Be Gone @ A Quilting Reader’s Garden
Fabric Frenzy Friday @ Forth Worth Fabric Studio
Can I get a Whoop Whoop? @ Confessions of a Fabric Addict
Needle & Thread Thursday @ My Quilt Infatuation
Show & Tell Tuesday @ I Have to Say

How to Measure a Year: “What the Hex” Finished Quilt

One year ago I started working on a twin-size quilt for my friend, Rommy, as part of an art exchange. She selected a set of aqua and green fabrics I had in my stash to use for her quilt. This quilt was full of firsts for me. I used new (to me) techniques: cutting triangles, piecing hexagons and sewing y-seams.

Finished twin-size

Finished twin-size “What the Hex” quilt (photographed on a queen size bed)

Binding Detail

Binding Detail

While piecing did not take long, the actual quilting took a few months. Between the 1/4″ spacing, stopping and turning, each unique hexagon took approximately 2 hours to complete.

Quilting Detail

Quilting Detail

Border Quilting Detail

Border Quilting Detail

The backing fabric came from a cotton shower curtain I rediscovered on a trip back to AZ. I thought the feminine print was a nice contrast to the geometric front. While it was wide enough, I had to piece in a bit for the length.  The only quilting difficulty came from keeping it smooth enough and preventing fabric tucks.

Backing fabric upcycled from cotton shower curtain

Backing fabric upcycled from cotton shower curtain

I also now understand the appeal of whole-cloth quilting. I love how the back shows off the intricate quilting design.

Walking foot quilting detail

Straight line quilting done with walking foot

Straight line quilting border detail

Straight line quilting border detail

After finishing the quilt, I decided to make two coordinating pillow shams from the scraps.  Embracing the “work with what you’ve got” philosophy, I used scrap batting in both shams and a plain white pillow case for the backing. Don’t tell my husband that I’ve started scrounging in the linen closet to supplement my quilting addiction.

Scrappy Pillow Shams

Scrappy Pillow Shams

I also made a hand embroidered label, mainly to cover up part of the backing that creeped up while quilting. It was the first time I ever tried hand embroidery and the first time I ever made a quilt label.

For Rommy | <3 Carrie 2015

For: Rommy | ❤ Carrie 2015

This has been my favorite quilt to date and I am a bit sad to give this one away. I take solace in knowing it will be going to a good home and be well-loved (and used) by Rommy.

Now to not-so-humble brag. Linking-up like crazy to:
Needle & Thread Thursday @My Quilting Infatuation
Sew Cute Tuesday @Blossom Heart Quilts
Show & Tell Tuesday @I Have to Say
Too Cute Tuesday @Funky Polkadot Giraffe
Can I get a Whoop Whoop?!?! @Confessions of a Fabric Addict
Link-a-Finish Friday @Richard and Tanya Quilts
Thank God It’s Finished Friday @Simply Pieced
Finish It Up Friday @Crazy Mom Quilts
Quilt for Keeps

How to Join Batting Scraps

Oh Scrap! How to join batting and reduce bulk

A few weeks ago during my 2015 New Quilter Blog Hop, I mentioned one of my favorite quilting tips about joining scrap pieces of batting. Today I am here to share more in-depth tutorial on how to do so.

Before I get to the nitty gritty, I encourage you to visit my fellow hive bloggers from last week and this week.  Also make sure to visit our hive “queen bee” to enter into the fabulous giveaways.
New Blogger Series

Week 3 Bloggers
Julie @Pink Doxies
Carrie W @The Zen Quilter
Lori @Sew Psyched
Cindy @Sewing Moxie

Week 4 Bloggers
Margo@Shadowlane Quilts and Crafts
Josi@Avocado Quilts
Deb @The Farmhouse Quilter
Emma @My Handmade Journey

Hive “Queen Bee”:
Stephanie @Late Night Quilter

Now for the main attraction:

How to Join Batting Scraps

When making larger quilts, I typically use a whole, new piece of batting but am often left with sizeable scraps that (when joined together) are perfect for smaller projects such as baby quilts.

Batting piece too small for pillow sham cover

Batting piece too small for pillow sham

Typically I only join two pieces of batting, but I have joined up to four pieces using the following method.

1: Make sure that the pieces of scrap batting you are joining are of the same material and loft. When storing my scraps, I fold the pieces into each other to keep like batting together.

2: Lay the batting pieces you are thinking of using so that there is overlap between the pieces of 3-4 inches.

Overlap Scraps by 3 or 4 inches

Overlap Scraps by 3 or 4 inches

When I first started quilting, I would stop at this step, baste and quilt. I was never happy as there would be part of the quilt that was thicker due to the double layer.

3: (Secret step) Cut through both layers of overlapped batting in a gentle wave pattern. I typically eyeball it but you can mark if so desired.

Cut through both layers in a wave

Cut through both layers in a wave

4: Remove the excess pieces of batting from the two halves. You will be left with two pieces of batting that butt up to each other flush in the curves.

Remove excess side pieces

Remove excess side pieces

5: Join the batting pieces using a loose whipstitch. This is just to hold them together temporarily while basting and quilting. You don’t want a tight stitch as this will form a ridge on the seam.

Loose whipstitch to hold the two adjoining pieces at the seam

Loose whipstitch to hold the two adjoining pieces at the seam

Joined pieces ready for basting

Joined pieces ready for basting

6: Baste and quilt as normal.

Basted and ready for quilting

Basted and ready for quilting

7: Enjoy your finished project without all the excess batting bulk. Secretly revel in your thriftiness and no one being the wiser!

Finished Pillow Sham

Finished Pillow Sham

Thanks for stopping by!

Carrie @ Chopping Block Quilts

Linking up to:
New Blogger Series

Sardinia Saturday Night

What’s a girl to do on a Saturday night when her husband is watching the Costa Rica vs. El Salvador Gold Cup game? Why recreate a QAL pattern and figure out fabric placement!

As mentioned previously, I am considering joining the Yuma QAL by Gotham Quilts.

http://gothamquilts.com/category/yuma-qal/

The design seemed perfect for my collection of Sardinia by Jessica Swift fat quarters; however, I was stuck on exactly how to place them.

Yuma QAL Fabric Selection: Sardinia by Jessica Swift for Blend

Yuma QAL Fabric Selection: Sardinia by Jessica Swift for Blend

Thankfully, the EQ7 tutorial from Meadow Mist Designs saved the day! While I initially tried to recreate the layout using the triangle template Cheryl shows, it did not work. Her tutorial did lead me to discover some other design tools in the software that eventually allowed me to recreate the basic design.

Yuma by Gotha Quilts created in EQ7

Yuma pattern by Gotha Quilts re-created in EQ7

The Yuma pattern by Gotham Quilts is available as a free download here.

I imported fabric swatches and after tweaking the original design placement, I came up with six different options. Of the five, I really only like the following three.

Yuma QAL Placement Option 1

Yuma QAL Placement Option 1

Yuma QAL Placement Option 2

Yuma QAL Placement Option 2

Yuma QAL Placement Option 3

Yuma QAL Placement Option 3

Hopefully after a few days of meditation the winning design will be clear. There is already one option that has started to emerge as my favorite. I will probably start cutting into my fabrics tomorrow and do a basic layout based on blocks similar between the two designs. This will also give a better idea of how the final product will look with the proper scale of the prints.

Any thoughts on which of option might work best?

Linking up to:
Design Wall Monday @ Patchwork Times
Show & Tell Tuesday @ I Have to Say

Cut to Pieces

So I wanted to start a weekly Thursday Trimmings Link-up party BUT because I am not (yet) on a self-hosted WordPress site I cannot do it. <<Insert frustrated growl here>>

I am determined to make it happen one day.

The only real productive quilting related thing I have accomplished in the last week is cutting into my selections for the Midnight Mystery QAL hosted by Meadow Mist Designs.
Meadow Mist Designs Mystery Quilt
Instructions were released on Thursday July 2 and I got to ironing and cutting my fabrics on Friday afternoon.

Pre-ironing

Pre-ironing

The print comes from a fat-quarter bundle of the 2011 Palmer Collection by Anna Griffin.

Fabric A selection from 2011 Palmer Collection by Anna Griffin

Fabric A selection from 2011 Palmer Collection by Anna Griffin

The final color was cut on Sunday morning and has been stashed away until next month. I have also saved my scraps and plan on using them in the backing.

Fabric cut and ready for the next step

Fabric cut and ready for the next step

Packed away until August  6

Packed away until August 6

I am also debating joining the Yuma QAL hosted by Gotham Quilts.

http://gothamquilts.com/category/yuma-qal/

The QAL and  blog hop started last month and runs until August. I think it would be a good pattern to use a few random fabrics and my fq bundles of Sardinia by Jessica Swift for Blend.

Yuma QAL Fabric Selection: Sardinia by Jessica Swift for Blend

Yuma QAL Fabric Selection: Sardinia by Jessica Swift for Blend

I’ve been struggling to find a project for these fabrics for awhile and when I saw the Yuma pattern, this set was the first thing that popped into my mind.  Just trying to decide on the fabric placement before cutting into these ladies.

What have you been cutting into this week?

Third Time’s a Charm!

How is it already July? For some reason, my crazy brain had me thinking that June follows June.

I am excited that July is finally here. My little brother’s birthday is today, I turn 30 at the end of the month and Cheryl at Meadow Mist Designs has released the first set of instructions for the 2015 Midnight Mystery Quilt!
Meadow Mist Designs Mystery Quilt

Of all the things going on this month, I am most excited about participating in my first QAL. I’ve got some (careful) fabric cutting in my weekend plans.

To keep the number of WIP’s at a minimum, the past two weeks or so have been focused on finishing my High School T Shirt Memory Quilt “quilt-over” and the “What the Hex” quilt for my friend Rommy. The actual quilt has been finished for a few weeks, but I am stuck on how to quilt the coordinating pillow shams I made from the scraps.

The memory quilt has undergone three transformations. I started it back in 2003 but did not finish it until many years later. After a few years of use, I  realized I was not happy with the layout and wanted to include a few more memories I was ready to stop wearing. I also wanted to fix the corners on the binding.

Quilt Version 1

Original Finished T Shirt Memory Quilt

The second life of the quilt had my first attempt at Free Motion Quilting on a “medium-arm” machine. Unfortunately, the stitch length regulation did not work so well and after a few years of use and washing, the quilting was starting to come undone. Additionally, the “cheater binding” method I had used did not have a proper join of the ends that was very bulky and not at all pretty.

Quilt Version 2

Quilt Version 2

So I decided to do a “quilt-over” and rebind the quilt again.. Using my trusty walking-foot and 1/4″ spacing, I quilted a simple square spiral in each t shirt block.

Quilt Over

Latest “Quilt-Over”

I also redid the binding, joining the ends seamlessly. It is much prettier and finished by handsewing the back. I think it might be my favorite part of the quilt.

Detail of Final Binding and Quilt Texture

Final Binding and Quilt Texture

I am extremely happy with this third (and final) iteration and love the texture of the quilting. When will they invent “Wonka Texture” so others can feel quilting through the computer screen???

Final Quilt Back

Final Quilt Back

Final Quilt Front

Final Quilt Front

The puppies are also excited to have the couch quilt back.

Dora snuggling with her favorite quilt

Dora snuggling with her favorite quilt

I declare this “WIP” (that has been years in the making) done!

Confession: This has been one of the most dangerous quilts I’ve worked on. I sustained a rotary cutting injury and needed 4 stitches back in 2004 and when hand sewing the binding, I sliced my chin with the needle and then proceeded to poke myself in the lip a few hours later. Who knew quilting was so dangerous!?!?!?

Linking up to:
Quilt for Keeps

Hop, Skip and a Jump!

So as mentioned previously, I am part of the 2015 New Quilt Bloggers. The focus of this group is for seasoned bloggers to provide technical advice and support to us newbie bloggers. Part of the support is participating in my first blog hop and the Sew Fabulous Hive!

It’s fun for me to have new visitors to Chopping Block Quilts, its fun for the visitors because you get to discover some amazing new quilting blogs and are eligible to enter to win a slew of amazing prizes from our fabulous hosts!

Super Quick & Random facts about me:

On the Line, Ready to Play

On the Line, Ready to Play Ultimate Frisbee

Name: Carrie
From: Arizona
Currently Resides In: Costa Rica (the Central Valley near some Volcanoes, not the beach)
Husband: 1, married 6mo or 2.5mo depending on which wedding you count
Puppies: Bernadette Shiva Garbage Disposal (9mo), IsaDora Paulina Gozer Sombra (7.5mo)
Scared of: Balloons, Needles/Knives/Blood (I got 4 stitches from a rotary cutter accident in college)
Began Quilting: 2002

My First Quilt made in 2003, loved by Dora today

My First Quilt made in 2003, loved by Dora today

Check this out if you really want to know more quick facts and my quilting history.

Blogging Tip:
Get involved! Whether your goal is to increase readership, get sponsors or simply have a better blog, the quilt blogging community can help. I joined the 2015 New Quilt Bloggers on a whim and fairly last minute. While the technical aspect appealed to me most, I have been overwhelmed with the new followers, generosity of advice, and support related to all aspects of blogging and quilting.

As part of being more involved in the quilting community, I am starting my first Quilt Along on the Midnight Mystery Quilt from Meadow Mist Designs. Fabric has been selected (and I am toying with the idea of making a second colorway).

Midnight Mystery Quilt Fabric.  Print from 2012 Palmer Collection by Anna Griffin

Midnight Mystery Quilt Fabric Selection.
Print from 2012 Palmer Collection by Anna Griffin

I am anxiously awaiting the release of the first block in July. There is still time for new members to join this QAL and I encourage you to do so!

Meadow Mist Designs Mystery Quilt

Quilting Tip:
While quilting is fairly popular in Costa Rica, most of my quilting supplies have come from my stash in Arizona lugged down on various trips. Batting is included in said supplies. A few years ago I learned about the proper way to join pieces of batting from the Encyclopedia of Quilting (I just don’t remember if it was this one or this one)

To reduce bulk, you overlay the batting by a few inches and then cut along the overlap in a wave like pattern. The pieces are then joined together using a flat stitch.

Joining batting pieces

Joining batting pieces

The result when quilted is batting that does not have bulky seams where it overlaps. I must apologize for not having better photos but I am now inspired to create my first tutorial! Check back soon!

Confession:
I love musicals. Live, in movies, and on TV. Disney, Rodgers & Hammerstein, Andrew Lloyd Webber and more. They are my go-to background noise when sewing. I can’t help but sing along.

Often times I wish life were more like a musical. I can make a song out of almost any situation. Usually they take the tune of some popular song with original lyrics. Sometimes they are awesome, sometimes they are awful. My brother can do the same, although he keeps his talent hidden. I think we learned it from our father as children. It makes life a little more joyful.

Hop! on over to the other members of my Sew Fabulous Hive this week:
Erin @ Twin Mom Quilts
Anja @ Anja Quilts
Adrian @ Quilting Fabulous

New Blogger Series
Skip! to our wonderful hosts:
Stephanie @ Late Night Quilter (our Hive “Queen Bee”)
Yvonne @ Quilting Jet Girl
Cheryl @ Meadow Mist Designs
Terri Ann @ Childlike Fascination

Jump! at the chance of winning some great prizes this week (and in the upcoming weeks). See our “Queen Bees” above for giveaway entry details!

Thanks for stopping by!

#TBT: High School T-shirt Quilt (for keeps)

The majority of the quilts I make are given away to friends and family.  I have only kept two for myself. For me, it is the best way I can show my love and support for others; even when I can’t personally be there.  When I make a quilt, my hope is that it will be used and enjoyed, not “preserved” by stuffing it into a closet.

Not surprisingly, others feel the same way.  One of the quilters from the 2015 New Quilt Blogger group share a post the other day highlighting a new initiative from Amy Smart, Quilt for Keeps. (I can’t remember who it was at the moment and am kicking myself so hard for not book marking their post. I will find it and link back. I promise.)

For Keeps Pledge

The only two quilts I have kept for myself are the first quilt I ever made (stored in the closet at the moment), and a t-shirt quilt made from my high school tshirts.

This quilt was the third quilting project I undertook. I started sewing it in college.  I would lay out the squares on the floor of the dorm room common area.  I even bled over this quilt; slicing my finger with a rotary cutter, going into shock (I don’t deal well with blood), and getting 4 stitches.  I lack feeling in the part of my finger to this day.

Original Tshirt Quilt

Original Tshirt Quilt

The actual quilting was a simple grid spaced 4″ apart.

Original quilting with part chewed out by parent's dog

Original quilting with part chewed out by parent’s dog

I followed the instructions and a free pattern found at Wal-mart.  Like most t-shirt quilt patterns I have seen, it required the use of sashing between the shirts.

Poor binding on corners

Poor binding on corners

When I first finished the quilt, I was please with the final result.  However; as my quilting improved over the years, I became less and less thrilled with the project.  Out came the seam ripper as I tore the whole thing apart.

Tert-Butyl helping figure out a new layout

Tert-Butyl helping figure out a new layout

Gaia approved the final layout

Gaia approved the final layout

In the second iteration of this quilt, I removed the denim sashing between the blocks. I added in a few more shirts I was finally willing to part with, and tried my hand at free-motion quilting for the first time.

FMQ for the first time

FMQ for the first time

Again, I was happy with the end result.

Revised quilt

Revised quilt

Revised backing

Revised backing

Better binding

Better binding

The past few weeks this t shirt quilt has been getting a lot more use. The rainy season has started and weather is cooler here in Costa Rica and it is the perfect weight blanket for curling up on the couch.  My puppies have been enjoying the quilt as well.

The FMQ job that I was happy with before began to show its flaws. Uneven stitch length and not burying threads has cause much of it to come loose.  Because this quilt has been getting more use (and washes) I once again decided it was time for a redo.

Berna snuggled up on a chilly morning

Berna snuggled up on a chilly morning

So now I am in the process of quilting it all over with 1/4 in spacing to make it more durable.  Taking a short cut, I have decided to simply quilt over the existing quilting.  I am sure that sentence will offend many a reader since it is no where near the proper way to fix a quilt.

Third time quilting

Third time quilting

For the time being, I am happy with the look and progress that is being made. I really love the texture of the 1/4″ quilting. I plan on redoing the binding yet again and joining the end pieces properly instead of layering and causing much bulk.

Personal disatisfactions aside, the quilt has been made to be used and it is for keeps.  Here’s to hoping that 3rd time’s a charm.